| ||||||||
|
||||||||


|
Home > 요리 > 테마요리 > 깔끔한 디저트 만들기 |
|
||||||||||||||||||||||||||||||||||||||||||||||||||||||||||||


|
|
   |
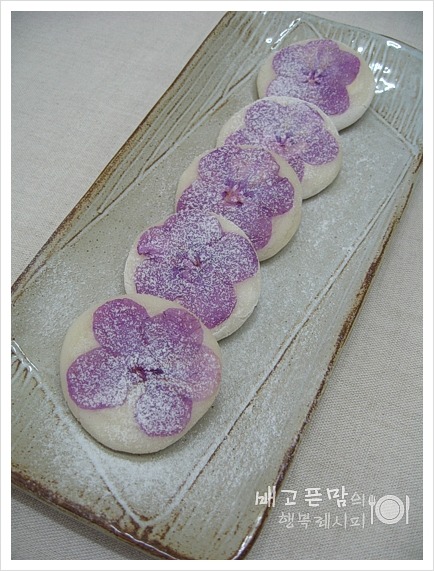
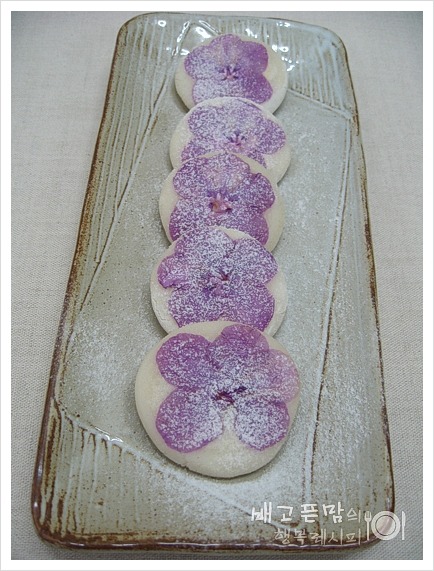
진달래 꽃전. | ||
|
||
http://cook.startools.co.kr/view.php?category=RUwNM0YsUg%3D%3D&num=FxFHdA%3D%3D&page=52

|
||
진달래 꽃전.
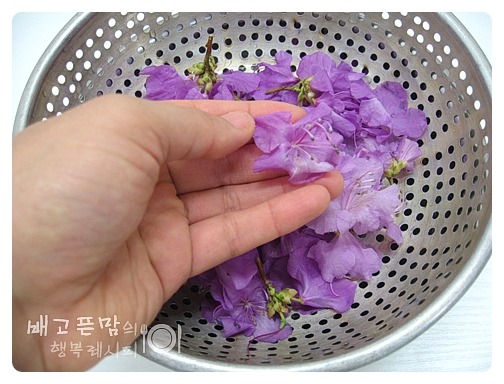
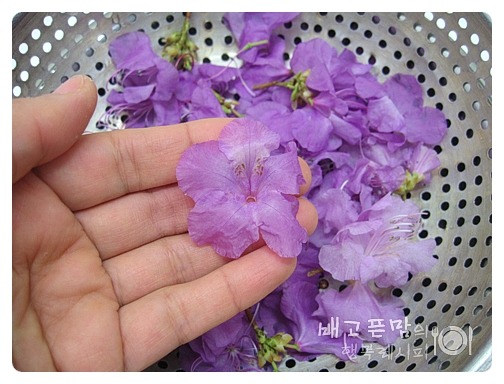
산에서 꺽어온 진달래를 꽃만 잘라줍니다.
꽃전을 하기전에 진달래 꽃의 수술부분을 없애 주어야 합니다.
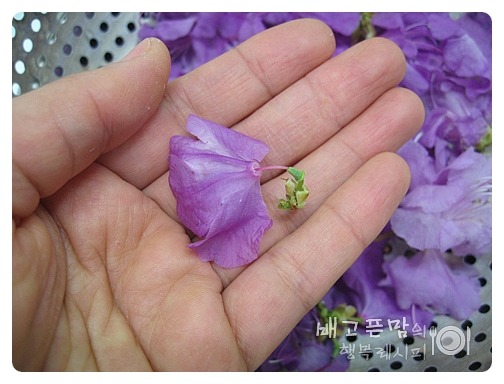
진달래꽃 뒷부분의 꽃받침을 살짝이 잡아 당겨 주면 중심에 있던 수술이 꽃받침과 함께 빠져나와요.
수술을 받쳐주던 꽃 받침이 없어져 나머지 수술들은 그냥 자연히 빠져 버린답니다.
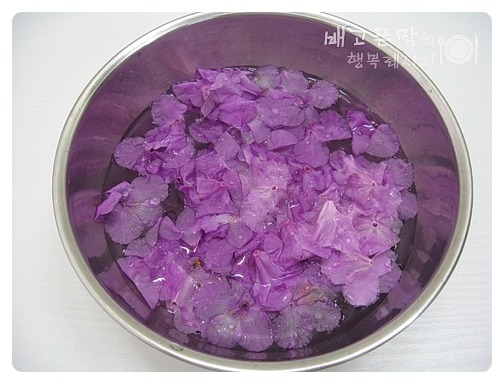
수술을 제거한 진달래 꽃을 찬물에 담궈 살살~ 흔들어 씻어 체에 건져 준후.....
키친 타올에 얹어 한번더 물기를 제거해줍니다.
전 밀폐용기에 물과 함께 씻은 진달래 꽃을 담아 냉장고에 하룻밤을 넣어 두었더니 완전 생생하게 꽃잎이 살아 나더 라구요. 축쳐진 진달래를 그렇게 보관 했다가 전을 만들었답니다.
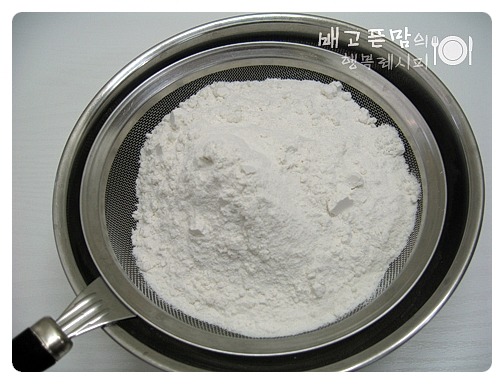
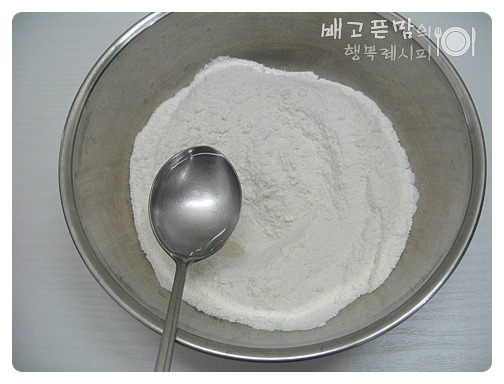
찹쌀가루 2컵을 체에 한번 내려줍니다. 전 마트에 파는 찹쌀가루를 사용했어요~~
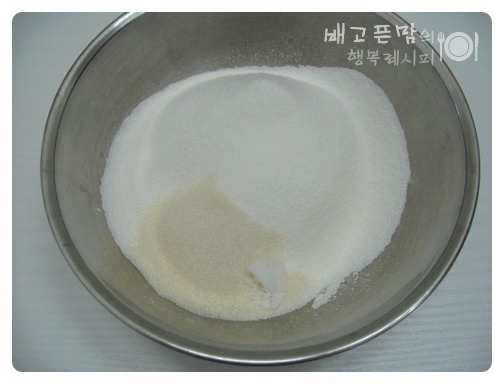
그리고... 설탕 2큰술,소금 1/2작은술을 넣어 고루 섞어줍니다.
그리고... 팔팔~ 끓인물 20큰술을 2~3번에 나누어 넣어 익반죽을 해줍니다.
***집에서 찹쌀을 불려 방앗간에서 빻아온 가루는 수분이 많으니 익반죽하는 물은 한번에 넣지 마시고 2~3번에 나누어 반죽의 되직함을 본후 양을 조절하면서 넣어줍니다.***
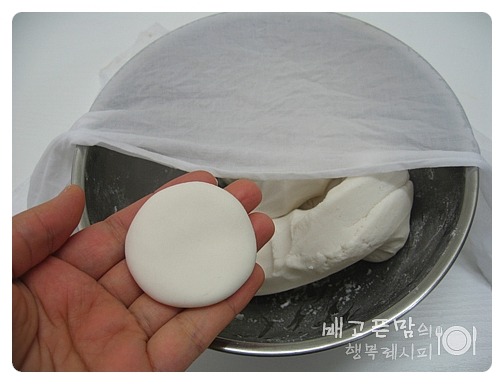
그리고... 반죽을 열심히 치대어 줍니다. 그래야 찰기가 생긴답니다. 전 TV를 보면서 시간 가는줄 모르고 열심히 오래도록 치대어 주었답니다. 손목이 아프네요.^^;;
반죽이 마르지 않도록 젖은 면보를 반죽그릇에 덮어 두세요~~ 그리고... 반죽을 새알심 만큼씩 떼어서 둥글 납작하게 빚어줍니다.
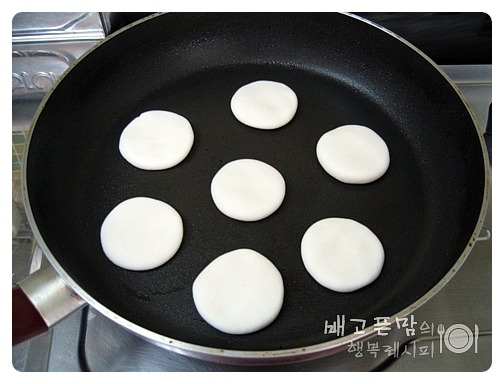
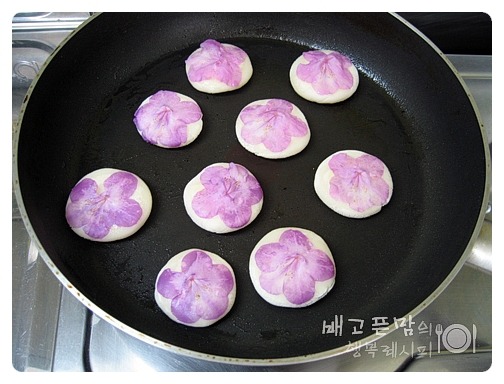
달군팬에 기름을 살짝이 두르고... 기름을 팬에 발라주는 정도로만 빚은 반죽을 올려줍니다.
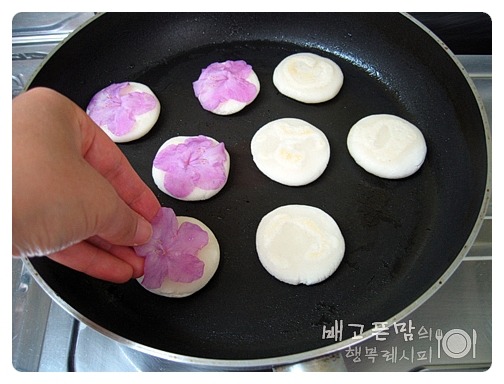
그리고... 한쪽면이 익으면 뒤집어 준후 익은 면에 준비해둔 진달래꽃을 올려줍니다.
그리고... 나머지 한면을 구워 익혀주면 된답니다.
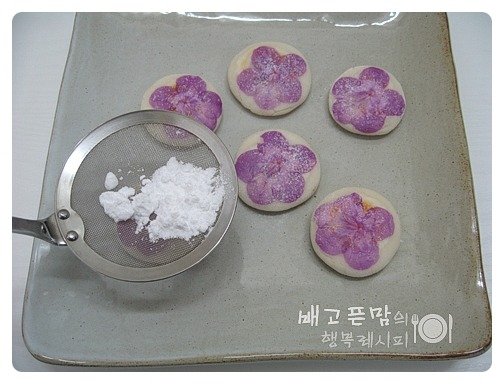
완성된 진달래 꽃전 위에 꿀이나 설탕시럽....등 취향껏 묻혀주세요. 전 슈가파우더를 뜨거울때 뿌려 주었답니다.
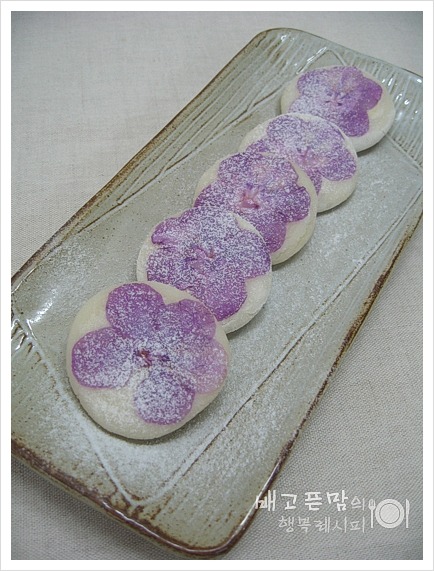
정말 눈으로 먹는 진달래 꽃전입니다. 진달래 꽃에 별다른 맛이 있을 거라는 기대는 안했지만 정말 눈으로 먹는 이쁜맛 밖에는 없었답니다.^^*
그런데도 왠지 모르게 달콤할것 같은 맛이 느껴지네요. 그건 아마도 함께 곁들이는 달콤한 슈가파우더 때문일테지요 |


| |
| 총 게시글 1,542개 |
 | 유자청러스크 | 조회: 8735 |
| → 유자청러스크 재료: 식빵 4장, 유자청 3큰술, 녹인 버터 2큰술① 식빵은 길쭉하게 3등분으로 자른 다음 녹인 버터를 표면에 고루 바른다.② 170℃로 예열... | ||
| [ 꼬마천사 | 2013-01-21 ] | ||
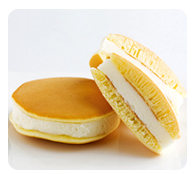 | 아이스크림도라야키 | 조회: 8702 |
| → 아이스크림도라야키 재료: 핫케이크가루 200g, 우유 ½컵, 달걀 1개, 아이스크림 4스쿠프, 포도씨유 적당량① 볼에 핫케이크가루와 우유, 달걀을 넣고 섞어 반죽... | ||
| [ 장미 | 2013-01-21 ] | ||
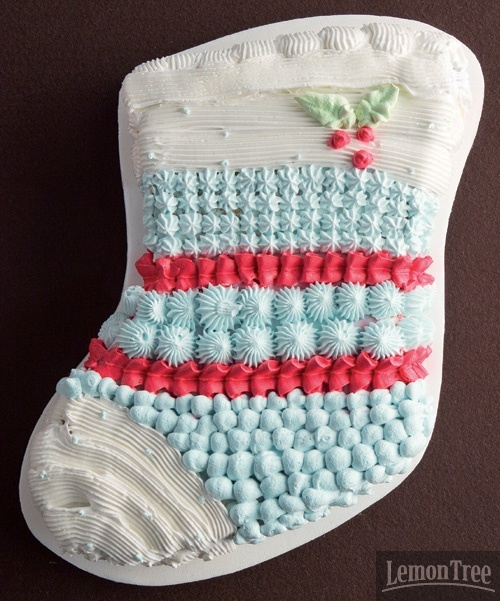 | 크리스마스 양말 케이크 | 조회: 13243 |
| 시판 카스텔라와 머핀 위에 크림 두르고 장식 만들어 완성하는 내맘대로 크리스마스 케이크. 네모 카스텔라 모양내기 크리스마스 양말 케이크 직사각형 카스텔라를 붙이고 모양... | ||
| [ 들바람 | 2013-01-11 ] | ||
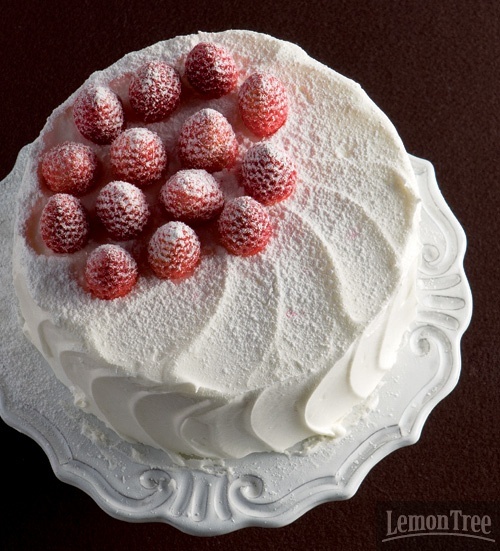 | 내맘대로 크리스마스 케이크 만들기 - 화이트 케이크 | 조회: 10612 |
| 시판 카스텔라와 머핀 위에 크림 두르고 장식 만들어 완성하는 내맘대로 크리스마스 케이크. 원형 카스텔라에 크림 장식 홈메이드 스타일 화이트 케이크 스패출러로 러프하게 ... | ||
| [ 후루룩소녀 | 2013-01-11 ] | ||
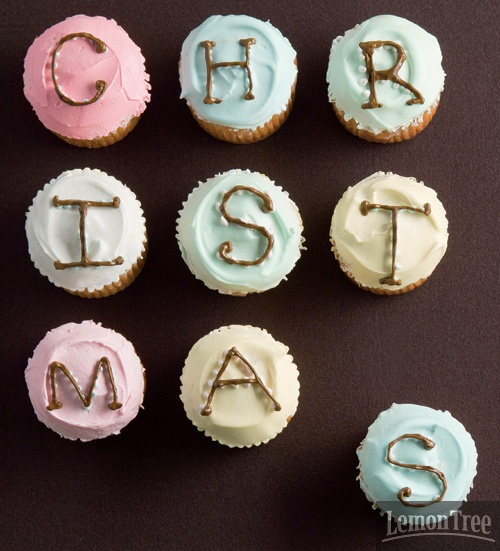 | 컬러 컵케이크 | 조회: 9534 |
| 컬러 컵케이크 2010-12-23 시판 카스텔라와 머핀 위에 크림 두르고 장식 만들어 완성하는 내맘대로 크리스마스 케이크. 컬러 슈거파우더의 활용 아이스크림 컬... | ||
| [ 쏘이 | 2013-01-11 ] | ||
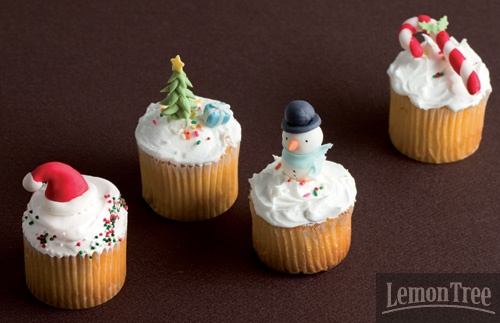 | 장식 컵케이크 | 조회: 10705 |
| 장식 컵케이크장식 컵케이크 2010-12-23 레몬트리 | 추천 0 | 조회 171 시판 카스텔라와 머핀 위에 크림 두르고 장식 만들어 완성하는 내맘대로 크... | ||
| [ 스마일 | 2013-01-11 ] | ||
  51 52 53 54 55 56 57 58 59 60 51 52 53 54 55 56 57 58 59 60   |
 |